


Cultivating Seasoning | My Salt Koji

<Working time 15min + a few hours of letting it sit>
Everyone, are you growing your seasonings? Haha.
It's so cute, isn't it? Haha.
Jokes aside, salt koji has effects and benefits that are rumored in the streets, but please try growing it at home. It might just be in your head, butYou can enjoy a clean umami flavor. And when using it as a marinade for meat or fish, you can use it boldly! Haha.
There are basic methods for making salt koji, but each household is different,
Let's incorporate Japan's national fungus 'koji' into our pets, no, into our diets, and overflow with beauty, health, and 'deliciousness! 😳✨'
This time, please see it as a salt koji from a certain household.
・Salt concentration just over 10% (it's on the lower side, but if you prefer to estimate when using, please try this concentration)
・Room temperature fermentation
~~~~~~~~~~~~~~~
【Ingredients】 *The amounts are written as ratios. Please adjust according to the size of your container.
・Storage container
・Dried rice koji...100
・Hot water....100
・Your favorite salt....40
・Water...100 (enough to submerge the koji)
▶view! Dried rice koji, bulk 500G (white koji No. 2 strain)
▶view! Natural salt from Okunoto / Sun-dried flat kettle method
【How to make】
1. Rehydrate the dried rice koji with hot water.
Put the dried koji in a bowl and break it up if there are any clumps.
Add the same amount of dried koji to 60-degree hot water, mix it well, then cover it with plastic wrap and let it sit for 1 to 2 hours.
※ If you don't have a kitchen thermometer, mixing equal parts of boiling water and 20-degree water will give you about 60 degrees. (Like making powdered milk)
When the temperature exceeds 65 degrees, the activity of the koji mold drops significantly. Adjust the temperature in a container without koji before mixing it with the koji.
2. Sterilize the storage container.
Now, please wipe the inside with alcohol, which is likely to be found in every household. If you don't have it, be careful of burns while sterilizing by boiling.
Since the salt concentration is low, let's put effort into managing the bacteria!
3. Mix the salt into the koji from step 1.
4. Once the salt is well mixed, place it in a storage container and pour in water until the koji is submerged.
5. Cover the container with kitchen paper or plastic wrap and poke air holes with a toothpick or bamboo skewer.

6. Leave it at room temperature for 1-2 weeks!
To ensure even fermentation, stir it with clean chopsticks once a day. ... It's okay to skip it for about a day. (Based on experience)
It's so cute that you might want to place it in a visible spot, but I think it's better not to expose it to direct sunlight.
~~~~~~~~~
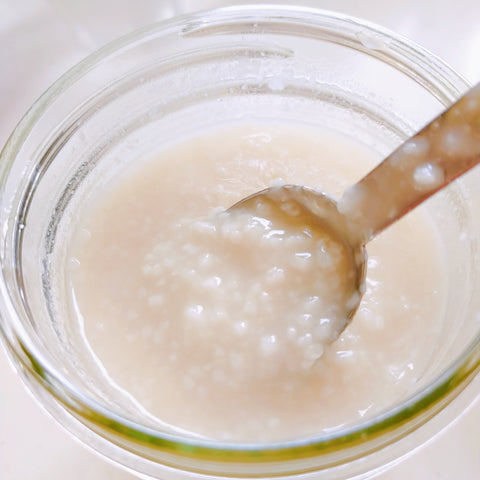
The thumbnail is about a week later. Once the core of the rice can be crushed, it should be fine. If it's for heating, you might be able to use it already.
Leave it at room temperature for another week!
~~~~~~~~~
7. When the core of the rice can be crushed with a little force, it's done.
Named: Koji-chan
Change to a sealed lid and off to the refrigerator!
\ Let's marinate! //
It is said that shio-koji contains about 20 types of digestive enzymes, including protease that breaks down proteins, amylase that breaks down carbohydrates, and lipase that breaks down fats.
When you marinate meat or fish, the enzymes break it down, making it tender and creating umami in the process. There's no reason not to marinate anymore!
Once you purchase the ingredients, cut them into bite-sized pieces, coat them with shio-koji, and freeze them for storage, which will save you time.
Due to room temperature fermentation, there may be cases where the core of the rice remains depending on the room temperature. If the rice has developed a core, it can be used for heating without any problem.
I want to be a person who can love both the homemade shio-koji and the special shio-koji made by artisans.